大雪天气
最后想给穿越机模拟器这个项目中的地图加上大学天气,先用个demo试验下,首先想到的就是用three.js的points来实现
第一步
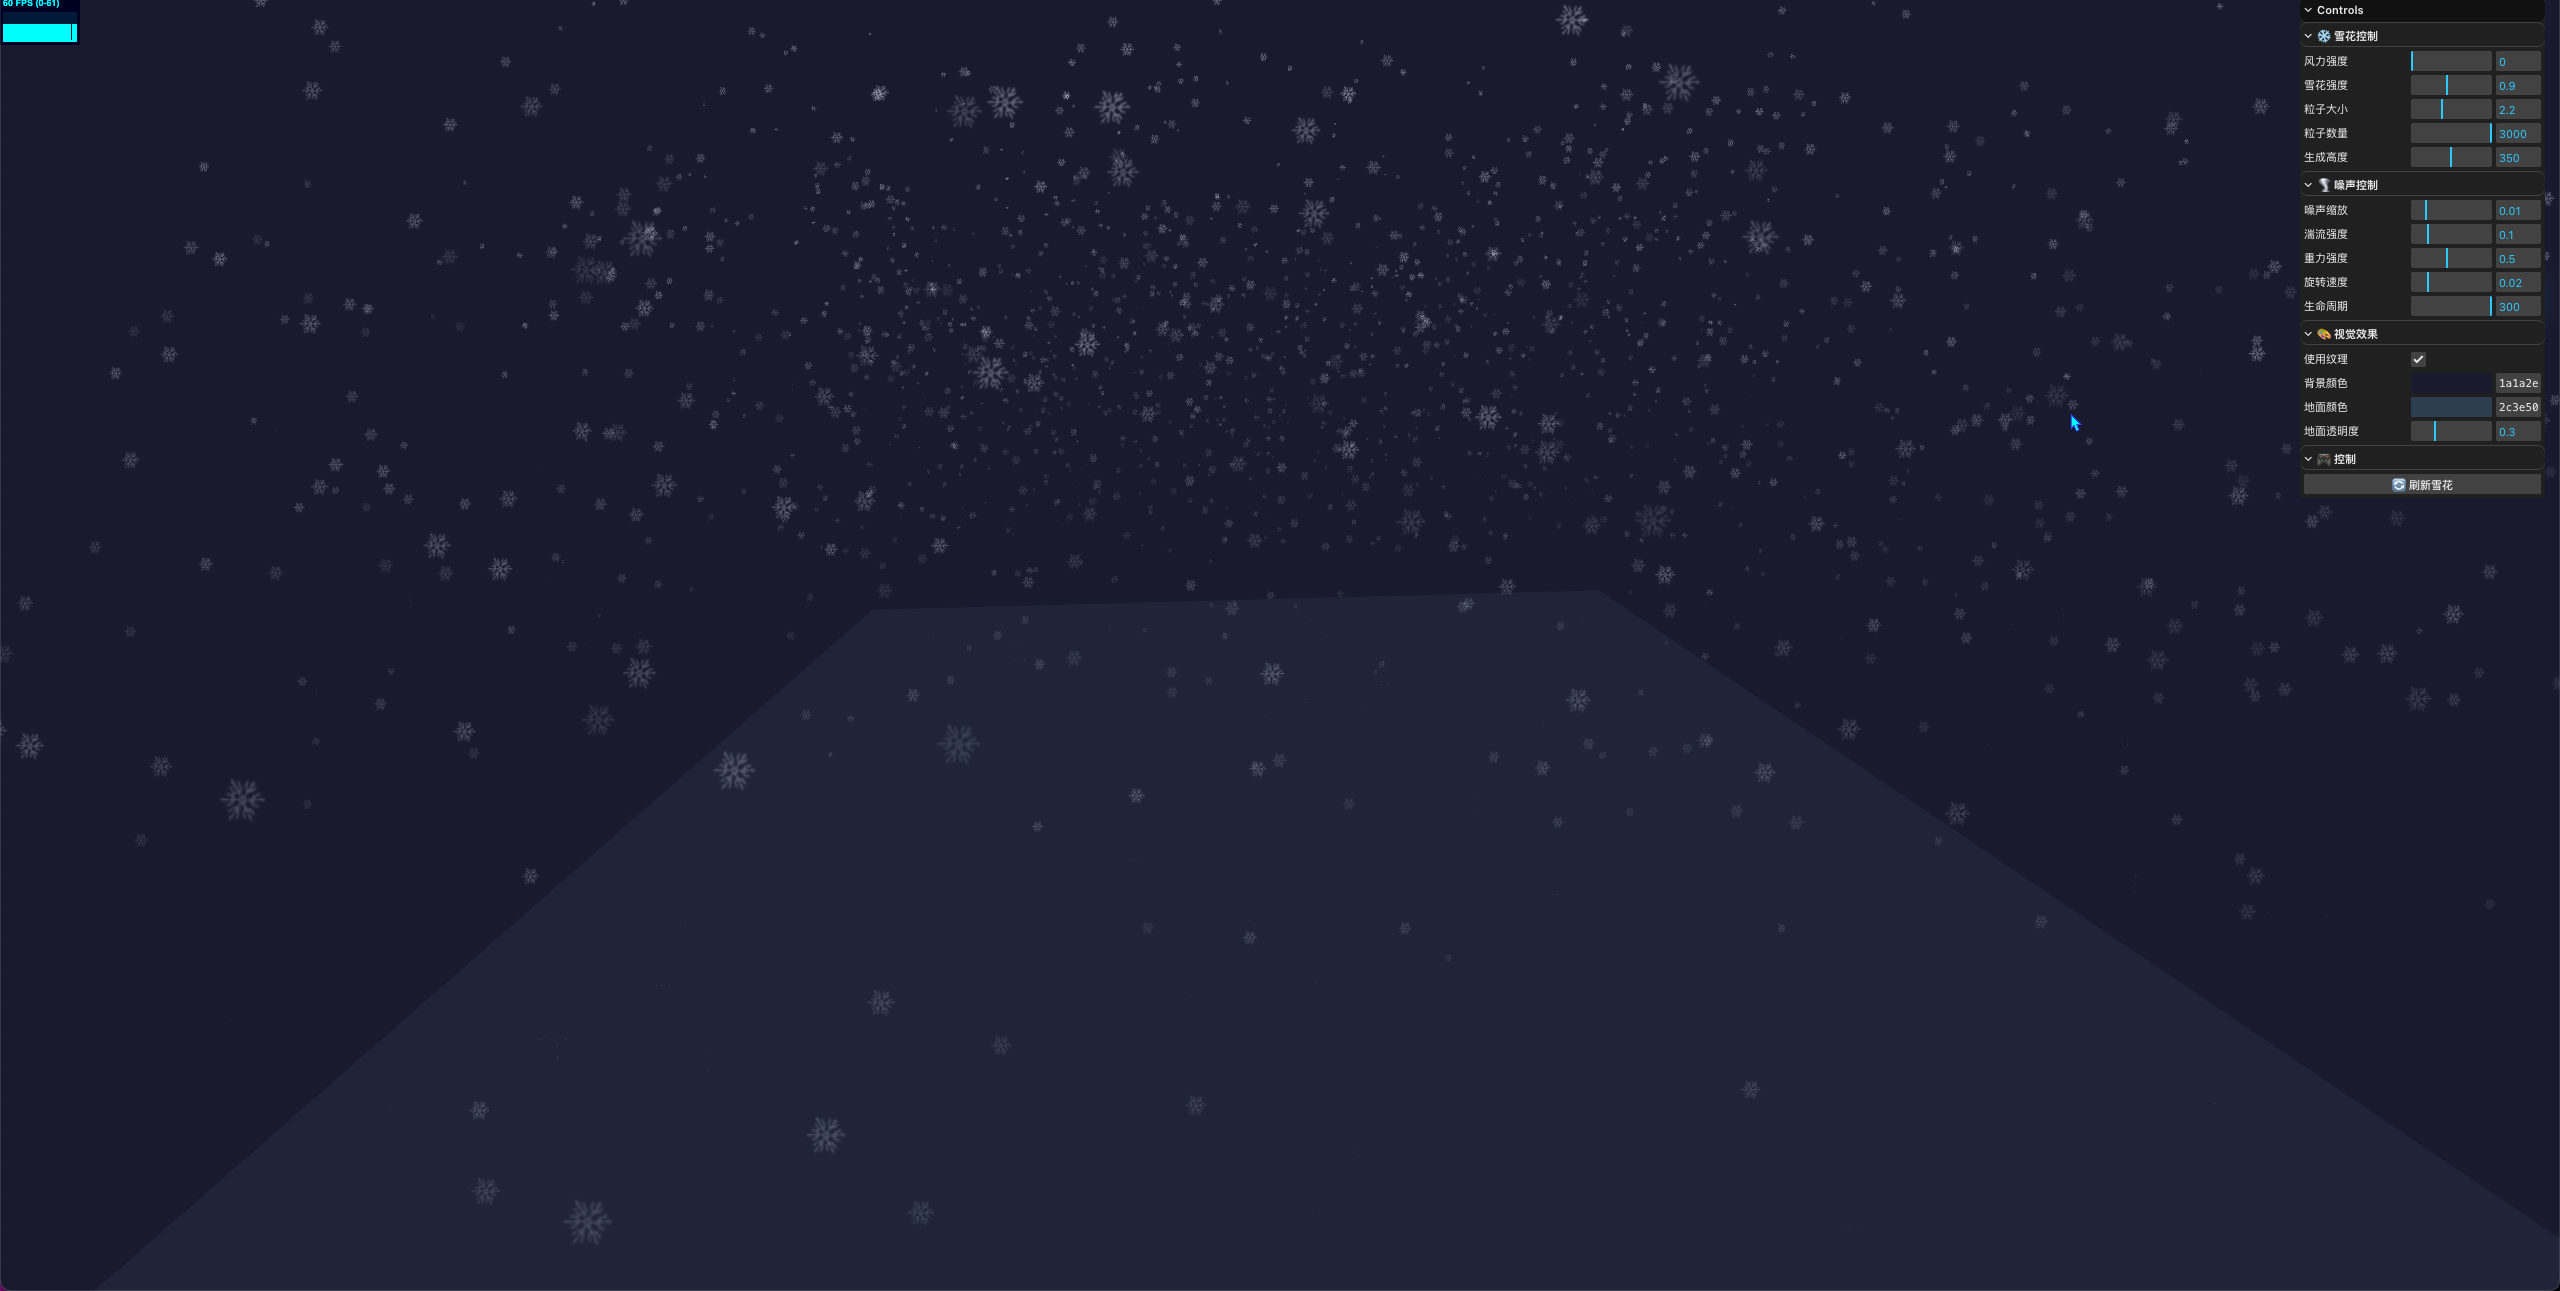
先用points显示个球体,把基本结构搭出来
主要代码
顶点着色器中简单用下面这种方式实现简单的近大远小的透视效果
vec4 mvPosition = modelViewMatrix * vec4( position, 1.0 );
gl_PointSize = size * ( 400.0 / -mvPosition.z );
let boxGeometry = new THREE.SphereGeometry(100, 20, 20);
const mergedGeometry = BufferGeometryUtils.mergeVertices(boxGeometry);
const positionAttribute = mergedGeometry.getAttribute('position');
const colors: number[] = [];
const sizes: number[] = [];
const color = new THREE.Color();
for ( let i = 0, l = positionAttribute.count; i < l; i ++ ) {
color.setRGB(1, 1, 0);
color.toArray( colors, i * 3 );
sizes[ i ] = PARTICLE_SIZE * 0.5;
}
const geometry = new THREE.BufferGeometry();
geometry.setAttribute( 'position', positionAttribute );
geometry.setAttribute( 'customColor', new THREE.Float32BufferAttribute( colors, 3 ) );
geometry.setAttribute( 'size', new THREE.Float32BufferAttribute( sizes, 1 ) );
const material = new THREE.ShaderMaterial( {
uniforms: {
color: { value: new THREE.Color( 0xffffff ) },
alphaTest: { value: 0.9 }
},
vertexShader: `
attribute float size;
attribute vec3 customColor;
varying vec3 vColor;
void main() {
vColor = customColor;
vec4 mvPosition = modelViewMatrix * vec4( position, 1.0 );
gl_PointSize = size * ( 400.0 / -mvPosition.z );
gl_Position = projectionMatrix * mvPosition;
}
`,
fragmentShader: `
uniform vec3 color;
uniform float alphaTest;
varying vec3 vColor;
void main() {
gl_FragColor = vec4( color * vColor, 1.0 );
gl_FragColor = gl_FragColor ;
if ( gl_FragColor.a < alphaTest ) discard;
}
`
} );第二步
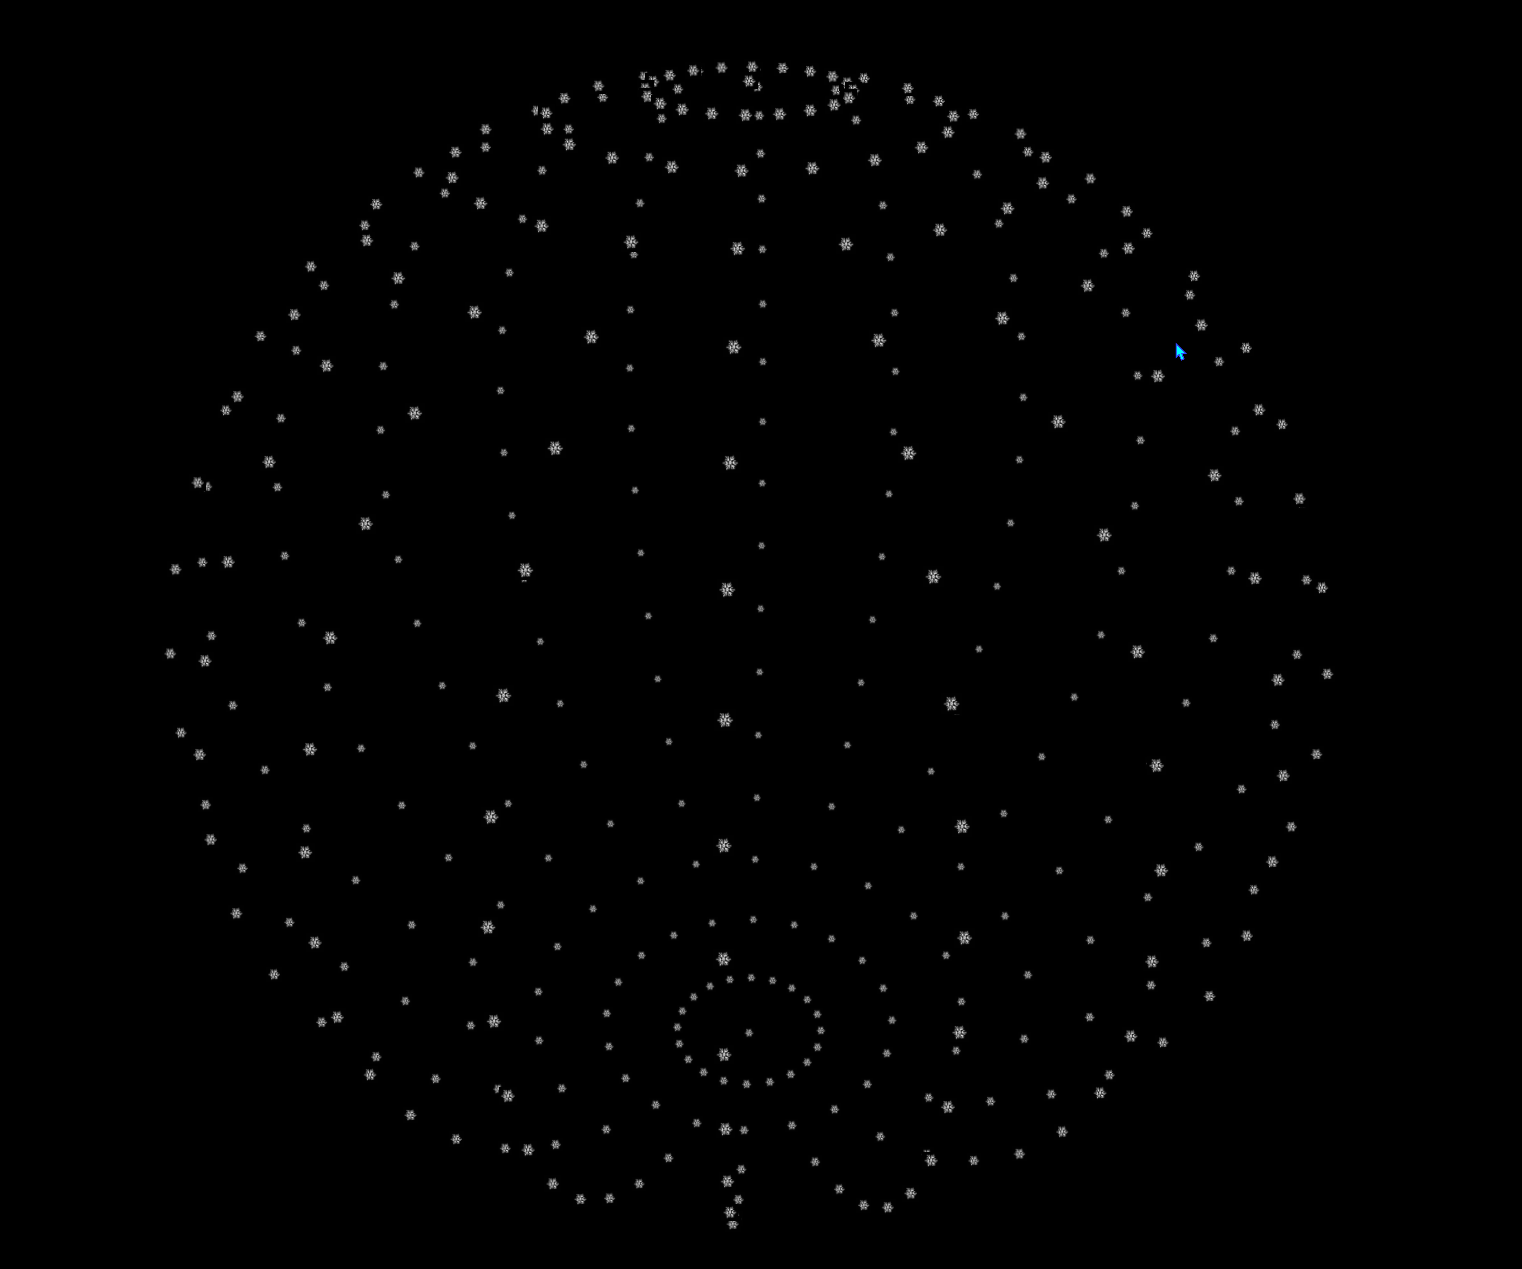
将雪花贴图换上去
主要就是修改材质那部分,增加一个变量pointTexture
const material = new THREE.ShaderMaterial( {

    uniforms: {
        color: { value: new THREE.Color( 0xffffff ) },
        pointTexture: { value: new THREE.TextureLoader().load( 'textures/snow.png' ) },
        alphaTest: { value: 0.9 }
    },
    vertexShader: `
        attribute float size;
        attribute vec3 customColor;
        varying vec3 vColor;
        void main() {
            vColor = customColor;
            vec4 mvPosition = modelViewMatrix * vec4( position, 1.0 );
            gl_PointSize = size * ( 400.0 / -mvPosition.z );
            gl_Position = projectionMatrix * mvPosition;
        }
    `,
    fragmentShader: `
        uniform vec3 color;
        uniform float alphaTest;
        uniform sampler2D pointTexture;
        varying vec3 vColor;
        void main() {
            gl_FragColor = vec4( color * vColor, 1.0 );
            gl_FragColor = gl_FragColor * texture2D( pointTexture, gl_PointCoord );
            if ( gl_FragColor.a < alphaTest ) discard;
        }
    `
} );
第三步
引入噪声模拟雪花生成规律
传统随机数生成器产生的噪声过于规律,无法模拟自然界的复杂变化。例如下面想实现的风里的效果就需要用到分形噪声
这个实现过程其实没什么太多可记录的,shader层面还是用的上面示例中的,主要是雪花位置更新啊的一些操作
效果如下,这里把雪花放大效果更明显
最近发布
